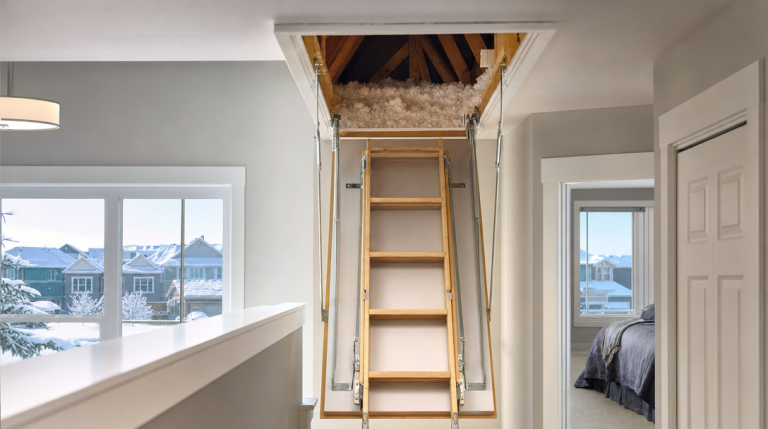
You have 18 inches of insulation across the attic and the upstairs hallway still feels drafty every time Calgary dips to -30 C. Before you blame the windows, look up. That plain square in the hallway or closet ceiling, the attic hatch, is often the leakiest, least-insulated spot in the entire ceiling. In many Calgary homes it is a bare sheet of drywall or plywood resting loosely on a trim lip, with nothing above it but cold attic air. It is a hole in your home’s winter coat, and it is usually a cheap one to close.
Quick Answer
Yes, an unsealed, uninsulated attic hatch leaks heat in a Calgary home. It typically sits at about R-1 in a ceiling that Alberta’s building code expects to be R-60, and it leaks warm air around its edges. Fix it by weatherstripping the frame, adding a latch, insulating the hatch panel, and building a dam around the opening.
Why is the attic hatch such a big problem in Calgary homes?
Heat moves toward cold, and the bigger the temperature difference, the harder it pushes. Calgary sits in Climate Zone 7A, where a January cold snap can put a 50-degree gap between your hallway and the air on the other side of that hatch. The National Building Code, Alberta Edition, asks for R-60 (RSI 10.43) in attic ceilings for exactly that reason. A bare hatch panel offers about R-1.
The numbers back that up. A standard 22-by-30-inch hatch covers roughly 4.6 square feet. In a 1,200-square-foot attic insulated to R-60 everywhere else, that one uninsulated panel drags the effective R-value of the whole ceiling down to about R-49 and carries close to a fifth of the conductive heat loss through the ceiling.
Air leakage is worse than conduction. Natural Resources Canada’s Keeping the Heat In guide puts the attic hatch at number one on its checklist of places to look for leaks, and notes that excess air infiltration typically accounts for about 25 percent of a home’s heat loss. Warm, humid air from showers and cooking rises to the top floor, finds the loose edges of the hatch, and flows straight into the attic.
How can I tell if my attic hatch is leaking heat?
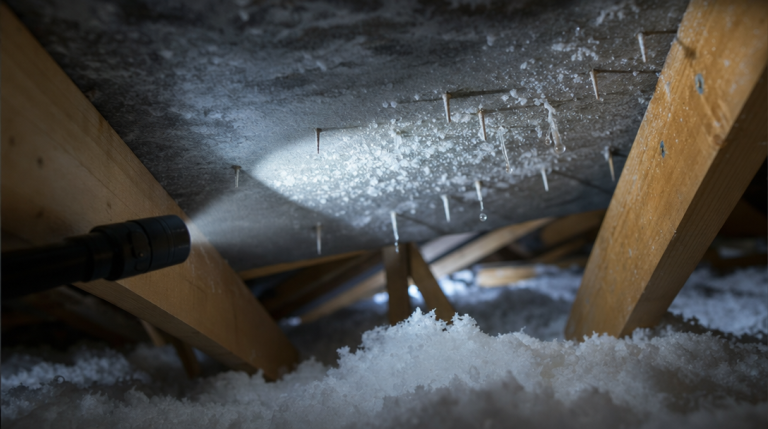
Start on a cold, still evening with the furnace running. Stand under the hatch and hold the back of your hand near the trim. A steady cool draft or a colder patch of ceiling around the opening means air is moving. During a cold snap, look for frost or condensation on the panel itself, or a yellowed, dusty ring on the trim where air has filtered through for years.
Then open it up. Push the panel aside, climb a sturdy step ladder, and look at the attic side of the hatch and the area around it. Common findings in Calgary homes built before the mid-1990s include a panel with no insulation at all, a thin batt that fell off years ago, loose-fill insulation that has slumped away from the opening because there is no dam holding it back, and no weatherstripping anywhere.
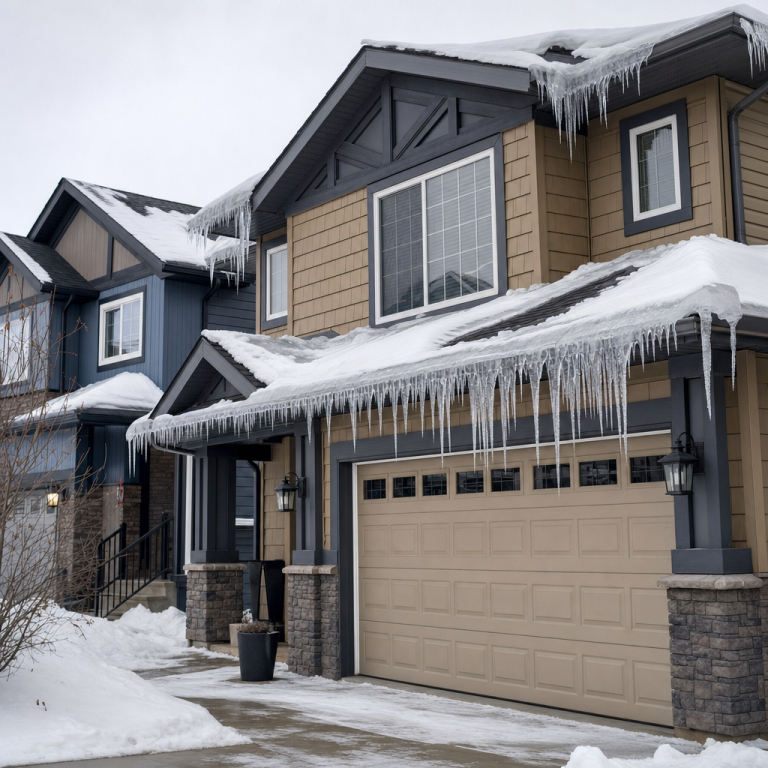
If you spot frost, a water stain, or compressed, discoloured insulation around the opening, you may be looking at the start of ice dam conditions. Keeping the Heat In specifically lists a leaky attic access hatch among the places where ice dams form on the roof above.
Seal, latch, insulate and dam: the four-part fix
Keeping the Heat In gives the clearest instruction you will find: seal the attic hatch exactly as you would seal an exterior door. Caulk the frame where the casing meets the ceiling drywall, run weatherstripping along the casing or the panel, and add hooks with eyebolts or a latch so the panel is pulled firmly against the weatherstripping. The latch is the step most people skip, and it is what makes the weatherstripping work.
Next, insulate the panel. The usual method is to glue and screw layers of rigid foam board to the attic side, cut slightly smaller than the panel so it still fits through the opening. Three to four inches of foam gives roughly R-15 to R-25. A prefabricated insulated hatch or an insulated cover box can reach R-40 or more.
Then build the dam. Blown-in cellulose or fibreglass slumps into the opening unless something holds it back. The U.S. Department of Energy’s weatherization attic hatch job aid calls for a rigid dam at least two inches taller than the finished insulation depth. In a Calgary attic blown to R-60, that means a dam of 18 to 24 inches made from plywood or rigid foam, so insulation stays at full depth right to the edge of the hatch instead of leaving a cold halo on the hallway ceiling.
| Step | What to do | Why it matters in Calgary |
|---|---|---|
| Seal | Caulk the frame to the drywall; weatherstrip the casing or panel | Stops moist indoor air from reaching the cold attic and frosting |
| Latch | Hooks and eyebolts or a draw latch to compress the weatherstrip | Rising warm air lifts a loose panel during cold snaps |
| Insulate | Rigid foam layered on the panel, or an insulated cover box | Closes the R-1 gap in an R-60 ceiling |
| Dam | Rigid border 2 inches taller than the insulation depth | Keeps loose-fill at full depth right to the opening |
How much heat and money does an unsealed attic hatch cost?
A U.S. Department of Energy-funded attic access fact sheet notes that a quarter-inch gap around the perimeter of a standard pull-down staircase can leak as much air as a typical bedroom heating duct supplies.
The hatch is one part of a larger system that includes every pot light, plumbing stack and bath fan penetration in the ceiling. ENERGY STAR’s seal and insulate methodology estimates that homeowners who air seal and bring attic insulation up to code save an average of 15 percent on heating and cooling costs, with higher savings in cold northern climates. The hatch is where you start because it is the biggest single opening and the easiest to fix.
There is also a damage cost. Humid air escaping around the hatch freezes on the underside of the roof sheathing during a cold snap. When a Chinook warms the attic 20 degrees in an afternoon, that frost melts and drips onto the insulation and ceiling below. Calgarians call it attic rain, and a leaky hatch is one of its favourite entry points. Sealing it is step one in lowering your Calgary energy bills through the attic.
Can I fix the attic hatch myself, or should I call a pro?
Sealing and insulating a simple hatch is one of the more DIY-friendly attic jobs. Weatherstripping, caulk, two hooks and eyebolts, a sheet of rigid foam and adhesive cost well under $100 at any Calgary building supply store, and the work takes an afternoon.
The limits show up once you look past the hatch. The dam has to be built from inside the attic, moving across truss chords without stepping through the drywall, in a space that may be well below freezing in November. And the hatch is rarely the only leak: a ceiling with a leaky hatch almost always has leaky pot lights and unsealed plumbing stacks too, which is why air sealing is best done as a whole-attic pass before new insulation goes in.
A sensible split: do the hatch yourself for a quick win this week, and have a professional handle the air sealing and R-60 top-up as one job. Our comparison of DIY versus professional attic insulation in Calgary shows where the line usually falls, and our breakdown of blown-in attic insulation costs in Calgary shows what a full upgrade runs.
Frequently Asked Questions
How much does it cost to insulate an attic hatch in Calgary?
Doing it yourself usually costs $50 to $100 for weatherstripping, caulk, a latch and rigid foam board. A prefabricated insulated attic hatch or pull-down stair cover runs roughly $150 to $400 at Calgary retailers. When the hatch is sealed and insulated as part of a professional air-sealing and R-60 top-up, it is typically included in the quote rather than priced separately.
What R-value should an attic hatch have in Calgary?
Aim as close as practical to the R-60 Alberta’s building code requires for the attic ceiling. In practice, three to four inches of rigid foam on the panel gives R-15 to R-25, and an insulated cover box can reach R-40 or more. Any insulation is a huge improvement over the bare R-1 panel found in most older Calgary homes, provided the hatch is also weatherstripped and latched.
Is it safe to seal the attic hatch completely?
Yes, as long as the hatch remains openable for inspections and emergencies. Weatherstripping and a latch seal the panel against air leakage without fastening it shut. Do not permanently glue or screw the panel closed, and never block a hatch that is the only access to equipment in the attic. Attic ventilation should come from soffit and roof vents, not from the hatch.
Why is there frost on my attic hatch?
Frost on the hatch means warm, humid indoor air is leaking around or through the panel and freezing on its cold attic side. It is a clear sign the hatch is unsealed and uninsulated. Left alone, that frost melts during a Chinook and drips onto the ceiling below. Weatherstrip, latch and insulate the hatch, and lower indoor humidity during cold snaps.
Should the attic hatch be fixed before or after adding blown-in insulation?
Before. Sealing the hatch and building the dam around the opening are part of the air-sealing and preparation work that should happen before new insulation is blown in. If the dam is not in place first, loose-fill insulation slumps into the opening and leaves a thin ring around the hatch. A professional crew does both steps in the same visit.
How Eco Attic Solutions Helps
Eco Attic Solutions has helped more than 780 Calgary homeowners close the gaps in their attics, and the hatch is one of the first things our crews check. During a free attic assessment we inspect the hatch, the insulation depth around it and every other ceiling penetration, then air seal, build the dam, insulate the panel and bring the attic up to R-60 with eco-friendly blown-in material in a single visit. Learn more about our residential attic insulation service in Calgary, or browse our attic insulation FAQ for common questions about timing and materials.
Every job is backed by our 12-Month Workmanship Guarantee, and flexible financing with up to six months deferred means you can stop the leak before the next cold snap rather than after it. Call (403) 990-9033 or request your free, no-obligation quote online and we will tell you exactly what your attic hatch, and the attic above it, needs this winter.